Tuesday, March 24, 2009
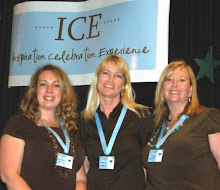
ICE '09 CANCELLED
Thursday, December 18, 2008
From our Home to Yours

This year I went with a photo card, because I had these amazing beautiful family portraits my dear friend, Tara, took for me at my sisters wedding last month. I made the card myself in photoshop using two freebie downlaods from www.faithsisters.com (a girls gotta love free!). The canvas was made 4"x8", since I was unable to find a local place to print this size on a blank card (there's lots of really great pre-made photo card templates out there these days) I merged 3 cards onto a 8x12 canvas and had prints made at Costco. You still have to cut them apart, and buy your own envelopes, but hey, at least I can say my card this year was semi-homemade!
EnJoy!
***HeatheR***
Wednesday, December 17, 2008

My ICE Chicks gave to me….
A shopping list!
First I loved the idea. I am a notorious list maker, but somehow my lists never seem to make it to the store with me, this way I have a nice handy place to create my shopping lists and keep it in my purse so its handy at all times. I loved the tin in the original, but unfortunately I don’t have a tin like that in my stash. So I put on my thinking cap and came up with this…


This is the front of my list organizer. I found this great quote on a stamp recently. I think it’s just perfect!

I love the idea of doing a themed organizer for Christmas, or any other occasion that requires a lot of planning…but I am just getting a little sick of Christmas- and I wanted to use this year round, so I stuck with this WeArememoryKeepers line called White Out. (LOVE LOVE LOVE this line BTW)
Inside on the left are 2 staggered pockets to hold various receipts, business cards, notes etc. I highly recommend sewing the pockets on if you plan to use this feature much- that will help keep your paper from popping off and the receipts from getting stuck in stray adhesive. (I would have sewn mine, but I lent my sewing machine out and well it hasn’t been retuned, I digress…)
Next on the right side I used some coordinating papers to create a background. Then I cut some notebook paper to make my list notebook. Using my cropadile I carefully punched two holes through the paper “pad” & the back of the Jewel case. Then thread a ribbon through to hold all the pieces securely. This will eliminate bulk inside the case so it will shut, and help hold the pad on without the background paper always falling out due to the weight. This also makes replacing the pad paper a cinch! WARNING…. This was a little difficult with the cropadile since the clearance on the hole punch is not very wide, I ended up having to break off a small piece of plastic to get the 2nd hole in. I recommend using the Big Bite…and if you are considering purchasing one of these tools ( I LOVE my cropadile) I suggest getting the big bite for this exact reason (and the longer reach).

Lastly I tied a ribbon around a shorten pencil and threaded through one of the holes. This way I never lose it! Keep your eye out for extra small pens for this. I recently saw some cute sets at Michaels’ in the stocking stuffers bins. Or you can be like me and steal a pencil out of your kids stash, cut it down to size and wala! When the case is closed the pencil fits perfectly along the spine.
EnJoy!****HeatheR***
Thursday, December 11, 2008
A funny for you
Twas the night before Christmas, I'm glued to the tree.
I'm wondering what Santa brought just for me.
Could it be cardstock or chipboard or lace?
Or a Cricut, I said, with a smile on my face.
And that's when I heard him,
"Hi Santa, " I said
"You know....good little girls should be in their beds".
"I know I should Santa,and now I've got caught.
But I was just so excited To see what you brought."
"Well, let's take a look in this room where you work.
He shook his head quickly,And left with a jerk.
I heard him exclaim as he put it in gear.
"You've got enough crap,
I'll see you next year!"
~Author Unknown
Tuesday, December 9, 2008
Guest Designer: Scribbles
This weeks Guest Designer is local artist Becky Wright and her company Scribbles. Her personalized HAND PAINTED signs are amazing! You can learn more about Scribbles at http://www.freewebs.com/scribblesigns/Scribbles
FUN, unique, personalized, hand-painted, character signs!
You name it, you design it, I "Scribble" it!
scribblesigns@aol.com
Monday, December 8, 2008
Holiday Reminder

Then I used a plain ‘ol mat I bought at Wal-Mart for .97 I was surprised to find that the beveled mat was actually 2 mats, so you could get 2 signs out of 1 if you were making several, and wanted to be a bit more frugal. I just covered the Mat(s) in scrapbook papers,& added a few embellishments.
Instead of framing it (which would be lovely also) I used my cropadile to punch 2 holes and made a ribbon hanger.

I hope that this poem will help you too to remember that the holidays arn't just about the gifts, the decorating, and even all the "good" things we do, but to remember to give the best gift of all to those around us; love. I know all to well how easily you can get wrapped up in doing things, even things for church, and charity, and selfless acts for the less fortunate and hurting, but sometimes its best to remember that you need to save some of yourself for those who matter the most.
Have a Blessed Season!
EnJoY!
***HeatheR**
Friday, December 5, 2008
What's in a name?

A name sign is a great gift. There are many ways to make a name sign, you can use a first name, or a surname, it can be elegant, or fun and playful. There is so many ways to go about making a name sign also.

This example was made by Cool Chick Jennifer Smith. She used a plain wood board for the base, painted and lacquered it. Then using a Cricuit she cut the last name from paper, & used additional papers to create a background. She used modge podge over the top of the sign to keep all the elements safe, added some ribbon and placed the sign on an easel. Cute!


You can find plain board ready to create on at you local craft store or Home Improvement store. Unique frames can be found at any discount store watch for the long frames usually used for matted collages.
If you have a personal cutting system such as the Circuit or the Silhouette you can cut letters for your sign from paper or even Vinyl. Depending on the size of your sign, premade monogram letters, chipboard letters, and stickers work great to create a name sign. Or check your local scrapbooking stores, many stores offer free workrooms with a Varity of diecut alphabets available!
EnjoY!
***HeatheR***
Tuesday, December 2, 2008
Easy cute Christmas tags
Today I wanted to show you some really easy, cute Christmas tags you can make to go on your gifts.Start with cardstock and cut out a tag. These are about 2 1/2 by 4. Cut a strip of paper to go across them. You can then cut out a printed or stamped circle image with words or a circle object of some sort would work great. I used a 2 inch circle punch for this. Then cut out a matching (or not-whatever your preference) 1 inch circle for the middle.
Monday, December 1, 2008
Popcorn Fun


On the fourth week before Christmas
My ICE chicks gave to me...
something a little corny!

Wednesday, November 26, 2008
Wishing You A Very Happy Thanksgiving
For Thanksgiving, I like to do some fun activities with my kids. We might to try a new recipe, or try our hand at a fun little craft project. A couple years back the girls and I made some cute little turkey themed napkin rings. We used the Quickutz turkey die for the front, then used brown chalk ink around the edges. We then cut a strip of paper and formed it into a circle and glued to the back to make the ring for the napkins. We then labeled each napkin ring the names of the turkey who would be sitting at that place sitting. :)

Tuesday, November 25, 2008
Sittin With Santa Layout
It's that time of the year! The Christmas Season is upon us. With Thanksgiving this week, the official Holiday Season is under way! ICE got in to the Christmas spirit early getting ready for the Canyon County Christmas show last week. We had so much fun meeting so many of you who are now planning to come to this year's ICE event. And reconnecting with old friends and some of last year's ICE participants!I'm sure many of you have many fond Christmas memories. I very clearly remember going the the mall every year and visiting Santa. This is a tradition I've carried on with my own children. Sure, when they were little we had some years with tears and screaming. Then they turned to years of shear awe and adoration. Now my kids are older and pretty much know how the whole thing works, but they STILL love going to visit Santa. And, faithfully Santa comes every year to grant their special Christmas wishes.
Two years ago my youngest daughter was seven. I knew my years of her "Believing" were numbered. So, off to the mall we went all dressed up in a pretty dress to visit "The Big Guy". Here's the scrapbook layout with the picture:
Some of you, who visited us at the Canyon County Christmas Show, picked up your own Santa layout like this. I wanted to post it on the blog so that you could see how it all goes together. It's pretty quick and easy assembly:
I picked mine up at Archivers. I love circles on my layouts! I also love using it for cutting rings, and other fun accents. This little baby makes circle cutting so easy, and you can cut in several different sizes. There are other templates besides just circles too. Monday, November 24, 2008
Christmas Countdown
OK almost caught up (please don’t let me mess you up there is really only 4 weeks left till Christmas- but I got behind on my blog posts!)
My ICE Chicks gave to me
A countdown to Christmas Eve!

TINS: You can find these little Tins at Michaels and I have seen them at Target also in the wedding supplies. (Look in the favors section). You can get a whole bucket of tins (30 in all) for 19.99 and if you happen to have a coupon…(who shops at Michaels w/o a coupon anyways??) I decorated each tin differently. It really helps to use a line of paper for this project that has several designs- I used the Figgy Pudding line by Basic Grey here. If you use a 2” circle punch it is the perfect size to fit your background paper in the tin lids. Use some clear drying liquid glue to Adhere most of your papers and embellishments. Use stickers, or stamps, or die cut numbers to label all of the tins. Glue magnets to the backs of the tins and wala! I chose to only do 12 days because doing 24 days would just be too much for me to handle….but hey if you’re up for the challenge… :0)
BOARD: This is a cookie sheet…yep a cookie sheet! There are all kinds of shapes and sizes out there. Use a cropadile or Big Bite to punch holes to thread your ribbon, this will really dress it up and make it look much less like a cookie sheet! LOL I use mine on an easel, but you could easily add a ribbon hanger to the top through a ribbon hole to hang on the wall.
TITLE: On this countdown I used cut letters and shapes from my Silhouette and used a good liquid glue to adhere them. (most cookie sheets have a non stick coating that can make some adhesives not work too well) On other countdowns I have made before I have used chipboard letters, which gives the finished project a nice dimensional effect. Stickers also work well and would make the project much easier if you don’t have a personal die-cutting machine.
FILLERS: There is a lot of fun ways to use your countdown. You can fill the small tins with candy or small trinkets. Some ideas are mini makeup, earrings, necklace’s, bracelets, rings, stickers, hair accessories, toy cars, legos, tea light candles, sample perfumes, etc. You can also get creative and hide a puzzle piece(s) each day to slowly put together that will reveal a secret or prize at the end. (you can easily make your own puzzle or write a message on the back of a small puzzle before breaking it apart). You can have scavenger hunts with clues each day or even a clue to where you have hidden something bigger that won’t fit in the tin. Or my favorite (and what we do at our home) is each day have a special family activity. I write these on strips of paper and the night before place a paper in the tin. (this way I can pre-plan and no one peeks!) I do things like…
*Go caroling * Take a winter wonderland walk * Bake cookies * Play a board game * decorate the tree* read the Christmas story from the Bible* Build a snowman* have a movie night (pick a favorite holiday movie pop some popcorn and enjoy!) * play a board game* Do something kind for someone less fortunate (we’ll bake goodies and secretly drop them off at someone’s home, or go buy some toys to donate to toys for tots)* Read a Christmas book by the light of the Christmas tree* Visit Santa* Go Ice Skating* Go sledding* etc etc…
I usually incorporate things we would be doing anyways into the calendar. Like if I know we are going on a special outing I’ll keep it secret and use that. Or when we get ready to bake cookies for the neighbors I’ll use the “bake cookies” one, and when we do traditional things like picking out the tree and decorating it or visiting the live nativity I incorporate these events into the calendar. My kids love opening the tin each morning and finding out what special activity we are doing that day. It really helps to bring us focused on spending time together as a family and enjoy Christmas rather than being frazzled!
EnjoY!
***HeatheR***
Saturday, November 22, 2008
It's begining to look a lot like Christmas....

Friday, November 21, 2008
MIA,Craft Show, & Christmas Fudge
What: Canyon County Christmas Show
Where: Idaho Center
When: Thursday November 21, 11am-9pm, Friday 22, 11am-7pm, and Sunday23, 11am-5pm
Make sure to stop by and tell us you are an ICE blog fan!
So I’ve gotten a bit behind on the Christmas inspiration posts… I digress… I had good intentions, life just seemed to get in the way! But do not fear I have lots of goodies still yet for ya! So be on the watch, I’ll be posting some fun ideas and maybe even a bonus idea or two soon!
So here it goes, Christmas Inspiration countdown late but, better than never, week 6!

The poem reads….(to the tune of Jingle Bells)
Dashing through the malls
with groceries yet to buy;
lessons, work and housekeeping,
life is so crazy! Why?
Bells on our phone ring,
the machine will take the call,
We have no time for family or friends,
it drives us up the wall.
How are you? How’s your life?
we really want to know.
We’d love to chat and hear the news,
but please don’t talk to slow.
How are you? How’s your life?
We really want to know.
hope you’re ready for Christmas,
Now maybe it will snow.
A day or two ago,
we thought we’d make a treat,
for all our special friends-
a Christmas gift to eat.
Our intentions were top notch,
but our schedules would not budge,
Hence here this year’s edition,
of homemade Christmas fudge!
EnjoY!
***HeatheR***
Thursday, November 6, 2008
Card Box
Here is the box closed. makes a cute gift all by itself no need for wrapping paper!
Pull off the lid and opens up a whole stationary kit to go! There’s a place for everything here… a pen, a notepad to keep birthdays or addresses in, a mini pocket to hold stamps, the back pocket holds standard size cards and envelopes, the front pockets can hold many things; here I used them to hold an array of mini note cards and some matching gift tags.

Is this not just the cutest thing???
Then I had an idea…

How about a box to hold some pre stamped Bella’s, sentiments, embellishments, and basic cards ready to be adorned with the perfect Bella and saying for any occasion that arises for the need of a card!


A Pocket full of Bella's

The recipient can embellish their finished card with some coordinating ribbon from thse cute tags. Another idea would be to include some mini colored pencils to color the Bellas with inside this pocket.

a mini pocket with several setiments to choose from for any occasion.

Notebook & matching pen

Everything the Build-A-Bella Box holds. Including Cards ready to be adorned with Bella & a fun tag with instructions for the recipient.