Friday, November 21, 2008

MIA,Craft Show, & Christmas Fudge

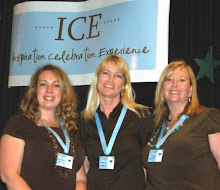
I know I’ve been MIA. It has been crazy around here! ICE has been gearing up for the Canyon County Christmas Show! We have been cutting and gluing our hearts out! WE have lots of fun stuff in our booth to sell and to inspire. If you’re local come visit us and say “hi!” We are offering a free make-n-take, and a great basket to giveaway filled with all kinds of scrappin goodies. Sign up for the Scrapbookers Escape, ICE ’09 and get free gift wrapping, some scrapping goodies, plus the early bird discount and a chance at winning a spot for free! Now it just can’t get any better than that! Sign up for yourself or give it as a gift! Tell your hubbies and loved ones what you REALLY want for Christmas and send them down to see us!

What: Canyon County Christmas Show
Where: Idaho Center
When: Thursday November 21, 11am-9pm, Friday 22, 11am-7pm, and Sunday23, 11am-5pm
Make sure to stop by and tell us you are an ICE blog fan!

So I’ve gotten a bit behind on the Christmas inspiration posts… I digress… I had good intentions, life just seemed to get in the way! But do not fear I have lots of goodies still yet for ya! So be on the watch, I’ll be posting some fun ideas and maybe even a bonus idea or two soon!
So here it goes, Christmas Inspiration countdown late but, better than never, week 6!


On the sixth week before Christmas
My ICE Chicks gave to me,
more cheap ideas using candy!


I think these candy bars are just the funniest (is that a word) They are great for neighbors, teachers and coworkers!

The poem reads….

(to the tune of Jingle Bells)
Dashing through the malls
with groceries yet to buy;
lessons, work and housekeeping,
life is so crazy! Why?

Bells on our phone ring,
the machine will take the call,
We have no time for family or friends,
it drives us up the wall.

How are you? How’s your life?
we really want to know.
We’d love to chat and hear the news,
but please don’t talk to slow.

How are you? How’s your life?
We really want to know.
hope you’re ready for Christmas,
Now maybe it will snow.

A day or two ago,
we thought we’d make a treat,
for all our special friends-
a Christmas gift to eat.

Our intentions were top notch,
but our schedules would not budge,
Hence here this year’s edition,
of homemade Christmas fudge!


EnjoY!
***HeatheR***

Thursday, November 6, 2008

Card Box


On the seventh week before Christmas
my ICE Chicks gave to me…
a box full of Bella’s for you to see!


I have to say I think this is my favorite of all my holiday projects this year. I have had so much fun making these! You can find great and detailed instructions on how to make your own Card Box from the original artist (I wish I could claim to be so creative!) at http://jackietopa.typepad.com/Stationary.pdf

Here is the box closed. makes a cute gift all by itself no need for wrapping paper!

Pull off the lid and opens up a whole stationary kit to go! There’s a place for everything here… a pen, a notepad to keep birthdays or addresses in, a mini pocket to hold stamps, the back pocket holds standard size cards and envelopes, the front pockets can hold many things; here I used them to hold an array of mini note cards and some matching gift tags.


Is this not just the cutest thing???

Then I had an idea…


How about a box to hold some pre stamped Bella’s, sentiments, embellishments, and basic cards ready to be adorned with the perfect Bella and saying for any occasion that arises for the need of a card!


A Pocket full of Bella's


The recipient can embellish their finished card with some coordinating ribbon from thse cute tags. Another idea would be to include some mini colored pencils to color the Bellas with inside this pocket.


a mini pocket with several setiments to choose from for any occasion.


Notebook & matching pen


Everything the Build-A-Bella Box holds. Including Cards ready to be adorned with Bella & a fun tag with instructions for the recipient.
Have fun, as you can see you can be creative with your box. The pockets can hold a multitude of things. How about a gift wrapping box, with the essentials such as mini scissors, curling ribbon, gift tags and cards? Or a teachers survival box with a persoanlized notepad, "Good Job" stickers, and a stash of emergency chocolate? If you come up with a creative twist on this card box let me know... post a comment!
Enjoy!
***HeatheR***

Tuesday, November 4, 2008

Vote!


Since today is election day I am feeling very patriotic and would like to inspire you to vote! We can sometimes forget what the women before us went through to give us the right and the privilege to vote.

I received this story in an email and do not know who to credit, but it is worth sharing.


WHY WOMEN SHOULD VOTE:


This is the story of our Grandmothers and Great-grandmothers; they lived only 90 years ago.

Remember, it was not until 1920 that women were granted the right to go to the polls and vote.

The women were innocent and defenseless, but they were jailed nonetheless for picketing the White House, carrying signs asking for the right to vote.

And by the end of the night, they were barely alive. Forty prison guards wielding clubs and their warden's blessing went on a rampage against the 33 women wrongly convicted of "obstructing sidewalk traffic".

They beat Lucy Burns, chained her hands to the cell bars above her head and left her hanging for the night bleeding and gasping for air!

They hurled Dora Lewis into a dark cell, smashed her head against an iron bed and knocked her out cold. Her cellmate, Alice Cosu, thought Lewis was dead and suffered a heart attack. Additional affidavits describe the guards grabbing, dragging, beating, choking, slamming, pinching, twisting and kicking the women.

Thus unfolded the 'Night of Terror' on Nov. 15, 1917, when the warden at the Occoquan Workhouse in Virginia ordered his guards to teach a lesson to the suffragists imprisoned there because they dared to picket Woodrow Wilson's White House for the right to vote. For weeks, the women's only water came from an open pail. Their food--all of it colorless slop--was infested with worms.

When one of the leaders, Alice Paul, embarked on a hunger strike, they tied her to a chair, forced a tube down her throat and poured liquid into her until she vomited. She was tortured like this for weeks until word was smuggled out to the press.

So, refresh my memory. Some women won't vote this year because- -why, exactly? We have carpool duties? We have to get to work? Our vote doesn't matter? It's raining?

Last week, I went to a sparsely attended screening of HBO's new movie 'Iron Jawed Angels.' It is a graphic depiction of the battle these women waged so that I could pull the curtain at the polling booth and have my say. I am ashamed to say I needed the reminder.

All these years later, voter registration is still my passion. But theactual act of voting had become less personal for me, more rote. Frankly, voting often felt more like an obligation than a privilege. Sometimes it was inconvenient.

My friend Wendy, who is my age and studied women's history, saw the HBO movie, too. When she stopped by my desk to talk about it, she looked angry. She was--with herself. 'One thought kept coming back to me as I watched that movie,' she said. 'What would those women think of the way I use, or don't use, my right to vote? All of us take it for granted now, not just younger women, but those of us who did seek to learn.' The right to vote, she said, had become valuable to her 'all over again.'HBO released the movie on video and DVD . I wish all history, social studies and government teachers would include the movie in their curriculum I want it shown on Bunco night, too, and anywhere else women gather. I realize this isn't our usual idea of socializing,but we are not voting in the numbers that we should be, and I think a little shock therapy is in order.

It is jarring to watch Woodrow Wilson and his cronies try to persuade a psychiatrist to declare Alice Paul insane so that she could be permanently institutionalized. And it is inspiring to watch the doctor refuse. Alice Paul was strong, he said, and brave. That didn't make her crazy.

The doctor admonished the men: 'Courage in women is often mistaken for insanity.' Please, if you are so inclined, pass this on to all the women you know. We need to get out and vote and use this right that was fought for so hard by these very courageous women. Whether you vote democratic, republican or independent party - remember to vote.


Happy voting!
Nancy

Friday, October 31, 2008


On the eighth week before Christmas
My ICE Chicks gave to me…
a bunch of ornaments for the Tree!


You can have so much fun with these clear ornaments. They make a great gift all by themselves or a perfect addition to any gift to give it a personalized finished touch. I created a few examples of some ideas but really anything goes, be creative!


The best part about creating these ornaments is you can personalize them. You can use a name, a monogram, the year, or any other settlement you’d like. Here I added a name with shimmer stickers to a ball filled with iridescent filler. Just stuff the filler inside the ornament and “fluff” using a paper piercer. ***TIP*** a paper piercer is a must have tool when making these ornaments-just be careful they break very easily!

Here I filled my ornament with punched snowflakes . On the outside I used another snowflake with glitter and toped it all of with lots of fun ribbon.

I had many people ask me how I made these glitter snowflakes (also seen in week 1’s candy tin idea). Here are the step by step directions….

Punch snowflakes from cardstock


Pour glue out generously, ( I used cheap-o Elmer’s glue for this project and just a lid from a storage container). Dip snowflake in glue, you want good coverage but wipe off any heavy globs.


Place on scrap paper and heavily glitter. Wait a couple minutes and carefully pick up. (tweasers work great for this.) If you missed any spots re-dip in glue & re-glitter.


Then place on wax paper to dry. If your fingers took off any glitter in this process sprinkle a little more on. Let dry over night. You will have a beautiful dimensional snowflake to embellish with!

This ornament is probably one of my favorites. It is stripes of patterned paper rolled up and placed inside! Mix and match coordinating colors for a interesting look. I also found that papers with small designs and solids work best.


Cut a strip of paper ¼ of an inch thick. Using a paper Piercer tightly roll the paper around piercer. Drop in ornament, don’t worry the coils will loosen after shaking the ornament around a bit.


Rub-ons are a great way to embellish an ornament. Be Careful not to use any rub-ons that are very big. The curve of the ball makes it somewhat difficult to get a good image especially if the rub-on is large or has straight lines. I suggest if possible cut the rub-on in sections and piece together.

A small tag and special ribbon is a wonderful touch to this simple yet elegant ornament.

This is another favorite idea. Fill your ornament with ribbon! Its pretty and it’s a gift within a gift! For that scrappy friend make a whole set of ornaments, each can hold things like buttons, brads, bling, and so on!
wrap a label tag around the front with ribbon and personalize it with a special message!


enjoy!
***HeatheR***


Tuesday, October 28, 2008

Harvest Surprise

This week's Inspiration Tuesday project was created by a wonderful crafty freind of mine -Tricia Smith. Tricia surprised me the other day with this super cute harvest themed gift that I thought was so stinkin' cute and clever, I had to share.


First, the adorable card is very cute! Notice the pumpkin on the card was created with three ovals. Then there is also the super cute pumpkin decoration that I received as my gift. The pumpkin is made by covering a roll of toilet paper with fun harvest colored fabric! How cute is that?! I didn't dare deconstruct it too much, but I did take a peek to see how she made the pumpkin. She placed the roll of toilet paper in the center of the fabric. Then folded and tucked the fabric into the center of the core of the toilet paper. For the stem she rolled up some craft colored paper with one end rolled up tighter at one end. The, she added fun pipe cleaners that appear to have been wrapped around a pen or pencil to give it curlies.

Hopefully my sweet gift will inspire some of you to possibly make your own harvest surprise for another lucky person. Thank you Tricia, my wonderful friend!
Tracy :)

Sunday, October 26, 2008

Thanks a latte!


On the 9th week of Christmas
my ICE Chicks gave to me...
A cute mug to hold coffee!

Better a little late then never right? Sorry for those on pins & needles waiting for the next Christmas inspiration project, my hubby & I spent 6 lovely days aboard a cruise ship visiting the Mexican Riviera…and as much as I love creating and sending you all great inspiration…I didn’t miss the computer one tiny bit; and I’ve have had a hard time getting back in the grove! BUT, I didn’t forget you…so even though week 9 is a little late, you can be glad to get doubly inspired this week (week 8 will be up in a few days!)

This project is for all the Bella fans! I created this darling coffee mug using latteabella (why of course!).
You can usually find these create-your-own type mugs at your local craft store, discount store at the holidays. I also found them (very reasonably priced) here…
http://www.orientaltrading.com/ui/browse/processRequest.do?demandPrefix=12&sku=26/2154&mode=Searching&erec=2&D=coffee+mug&Ntt=coffee+mug&Ntk=all&Dx=mode%2bmatchallpartial&Ntx=mode%2bmatchallpartial&N=0&requestURI=processProductsCatalog&sd=Color+Your+Own%21+Dad+Artist+Travel+Mug
***TIP*** when you create your mug watch how many layers of paper you use, although different brands may vary-but my mug had less space at the top of the mug than the middle/bottom, so ended up having to change my design to get it to fit inside.
Use the original insert as your guide to cutting your background papers, you will need to have everything curved so that once inside it all lays flat and has nice finished edges (this includes any strips of paper used in the design)


To make any gift *WoW* add special touches. This is simple with handmade gifts because you can use the same supplies to create additional coordinating gifts. Here I created a pocket for some coca, a baggie of mini marshmallows with a cute topper, and a gift tag. Wrap this all up with some cellophane and you look like you spent a fortune! This is great because you can customize the gift to the recipient’s likes and personality too!

Enjoy!
***HeatheR***


Tuesday, October 21, 2008

Guest Designer - Courtney

Our guest designer this week is Courtney Holgate. Courtney joined in a "Trading Faces" swap with the Idaho Scrappers, where she did a layout with pictures from Heather.

Thank you, Courtney, the layout is amazing!

Imagine the pressure that I felt, after signing up for a Trading Faces swap for the first time, getting Heather, one of the most admired scrapbookers and photographers in the group, as a partner. I knew instantly that I had to really bring it in order to do the super cute pictures of her daughter Abby justice.

After going through my stack of designer paper to see what jumped out to me, I decided on a couple of sheets from Phoebe by Basic Grey.


Sometimes I find that designer paper with large elements is difficult to work with since you don't want to cover up the large portions of the paper. I mean, that's the entire point of the design paper right? So working with this paper and the enlarged photograph of Abby, I decided to cut along the large flowers of the patterned paper and layer them over the photograph and the title block. After cutting the flowers out with an Exacto knife and sliding the picture or the title block underneath the cut out portions, I used a little pop dot to add a little dimension to the over all layout. This technique aloud me to use the enlarged photo+title block+designer paper, without loosing the large elements of the designer paper that I loved so much.


After trying to think of something a little more cleaver, I finally decided on "Beautiful Ballerina" for my title, creative I know. I thought for sure I had a Making Memories rub on in white of the word "beautiful" but after rummaging through my stash all I was able to find was black. I decided that, instead of going to the trouble of hand lettering or rubbing on each individual letter of the word, I would just use the black rub on and go over it with my whito Signo Uniball pen. I love that pen! This is an easy tip to turn rub ons white or just add a little white accent here or there.


Once I finished the title page, assembling the second page was a breeze, something I was a little stressed out about since I typically do one page layouts. I chose another sheet from the Phoebe collection with a similar pattern, repeated the cardstock used on the title page and decided on two 4x6 pictures, and a 5x7 picture (the 5x7 was my favorite out of the bunch that Heather sent). The two 4x6 photos were adhered on the ends of a 6.5x12 sheet of fushia cardstock, then the 5x7 was matted on a piece of yellow cardstock and I tied some ribbon around it. Since the 5x7 was my favorite photo, I wanted it to stand out a little more, so I popped it up with pop dots when I added it to the layout.


Once the basic aspect of the two layouts were finished I decided I needed to jazz it up a bit. I added pearls in the middle of the large flowers on the title page as well as on the corner of some of the photos. I also added some Prima flowers on the second layout to give it some umph.


Even though this was a real challenge for me, I really enjoyed creating these pages for Heather and Abby. I hope she enjoys them as much as I did!