I’m so excited! ICE is less than two weeks away! Now its time to start thinking about what to bring and start packing my crop bags ! For a weekend of scapping at an event like ICE I want to be as productive as possible without bringing my whole scraproom, to do that I create Power Layouts. What’s a power Layout you ask? Well read on….
The first step, pick out your photos.
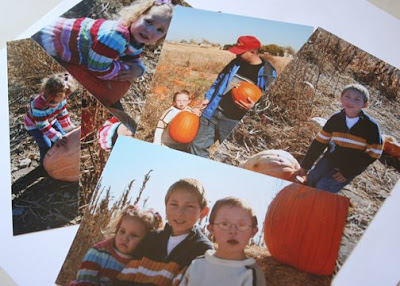
I chose pictures I already had preprinted. However if you are choosing pictures from your computer that have yet to be printed you may want to first chose a sketch so you can print your pictures in specific sizes.
Look for a sketch or idea
 This step can be optional, Depending on how much time you want to dedicate to creating your power LO’s. However the more decisions you make prior to the crop the more time you have create at the crop. Choosing a sketch prior to picking out your papers & embellishments can help you decide what to bring.
When choosing a sketch I look at my photos and ask myself these questions… how many photos do I have? How many are Horizontal? Vertical? Am I willing to discard or crop any photos? What is my focus for my LO? Do I have one strong photo with supporting photos? Or, are all my photos important & need equal balance?
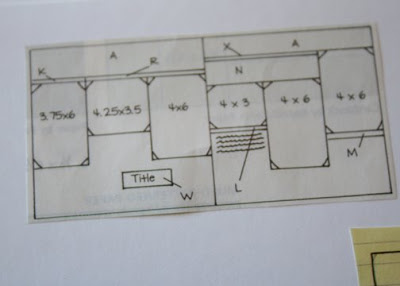
Found the perfect one! One thing that helps me decide on a sketch ,is to grab two sheets of 12x12 cardstock (or whatever size paper you will be using) and lay out my photos and even embellishments & paper to check and see if a sketch will work.
Pick out papers and cardstock
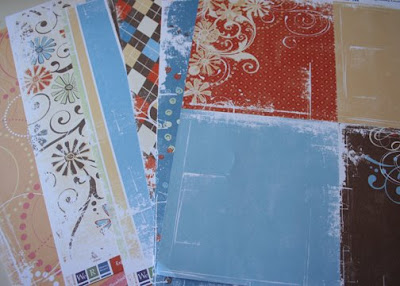
This is the fun part! First I usually turn to my stash to look for papers that work with my photos. When looking for paper I keep in mind, theme, & color. If I don’t have something in my stash then off to the scrapbook store I go! Make sure to take your photos with you when shopping, it will help you pick papers that coordinate not compete with your photos.
Pick out matching embellishments
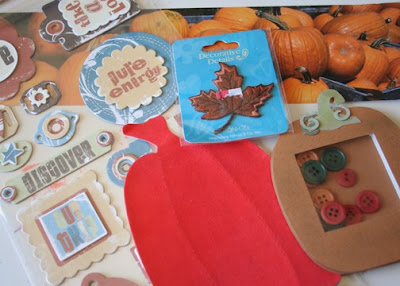
Again first check your stash, you never know you maybe have that perfect item already. However sometimes a trip to the LSS is just unavoidable! Manufactures make it easy to pick out paper & embellishments with collections and lines. Many lines not only have several coordinating papers, but also matching embellishments, ribbons, rub-ons and more. But beware don’t get too caught up in buying everything they have to offer in one line (unless you plan to create several pages with it) it can be expensive and leave you with a lot of leftovers. Pick & chose carefully what will work best for your photos and the vision you have for the finished product.
Titles, & Journaling
Again this is somewhat an optional step prior to the crop. By pre-choosing a title I can decide what type of media I will be using to create the title (stickers, chipboard, digitally cut, printed etc..) If you are planning on doing your journaling on the computer by pre-typing & printing it out will have you one step further to having a completed LO at the crop. ( a sketch is helpful to decide on how much space you have to journal)
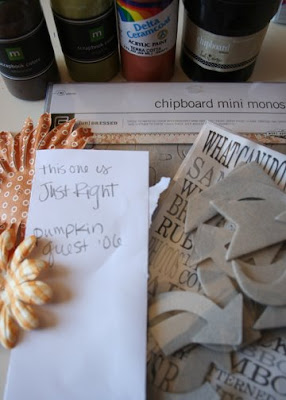
I had to do a little research on my favorite scrapbooking sites to find the perfect title for my LO. Since pumpkin patch pictures seem to be a yearly tradition I wanted something different than the usual “pumpkin patch” title. After finding a couple ideas I jotted them down, I also added a few more things to my stash of embellishments after seeing some inspiring ideas on the web.
Now if your like me you will usually WAY over pack. but that’s OK. I’d much rather pack too many things than not enough!
Pack 
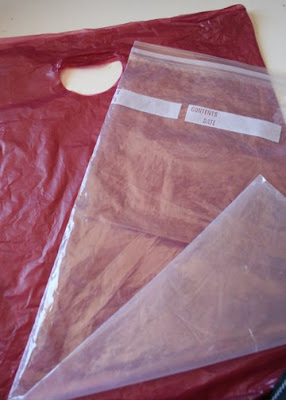
Now to pack your crop bag. There are several ways to organize your power Layouts. two of the most cost efficient and easiest are to reuse sacks from your scrap store or use extra large ziplock bags.
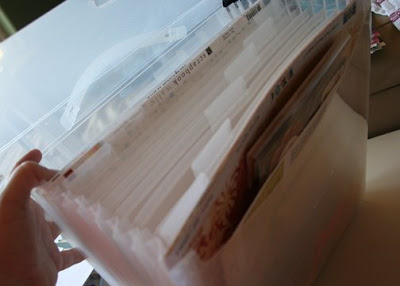
My personal favorite is an accordion style paper holder. There are several dividers to organize several power layouts. Its nice and sturdy to keep my paper from bending and its easy to transport and slip into my crop bag.
I don’t recommend including your larger items with your paper and photos, such as punches, paint, or large boxes. For these items I either stash them in various pockets of my bag or in one large box. And I keep a tool box for all of my basic supplies like adhesive, pens, chalk inks, and more.
Ok now you have just under two weeks to get packing for ICE. One of the greatest things about creating power LO’s is getting excited about cropping. Now that I have all the items picked out for my next LO I’m really itching to create it! Make sure to drop by my crop table and say hi, I’ll surely be working on this LO sometime during the weekend!


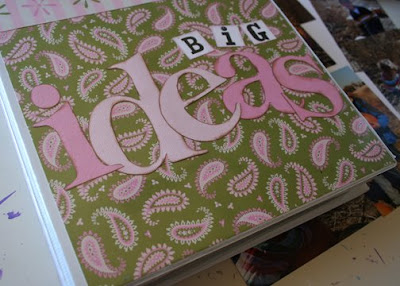 For me the first thing I turn to is my Idea book. (want to know more about creating your own idea book? take the class! click for more info:


 Tag 4, I used some Doodle Bug paper frills inked with a tangerine chalk. Prima Flowers, Queen & Co. Brads with the words “Be Happy” , an acrylic heart by Heidi Swap with more chalking around the edges and a pretty v shaped ribbon at the top.